2.1 - Preparing your experiment
To use the VariantSeq protocol for calling and annotating SNPs and Indels, go to: Variant Protocols → Step-by-Step Mode → SNP/Indels.
As shown in Fig.2, a new submenu appears in the workspace that lists the available options in VariantSeq for SPMI analysis:
- Preprocessing
- Mapping
- Trainings Sets
- Postprocessing
- Variant Calling
- Variant Filtering
- Annotation
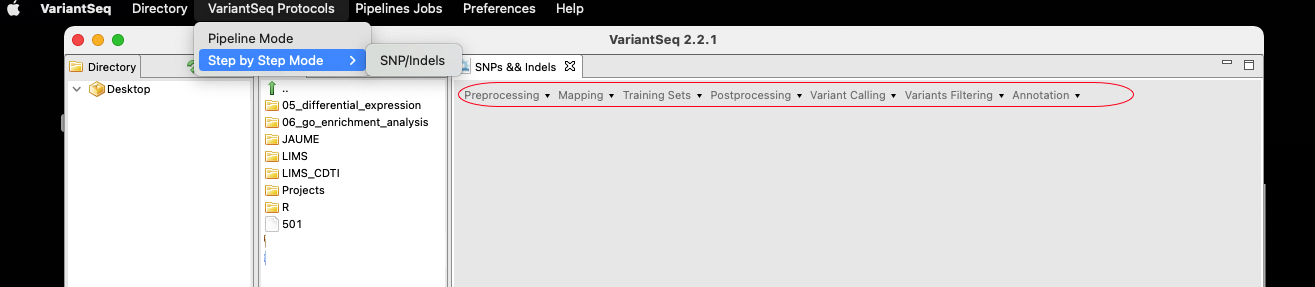
Figure 2. VariantSeq modes (SNP/Indels protocol).
As previously stated in the sections above, we call and annotate variants using distinct cancer exome samples. To do this, complete the following steps:
Quality analysis → Preprocessing → Mapping → Postprocessing → Variant Calling → Variant filtering → Variant annotation
From the Preprocessing tab, we use FASTQC (Andrews 2016) for quality analysis and PRINSEQ (Schmieder and Edwards 2011) for preprocessing.
From Mapping tab, we use the mapper BWA (Li and Durbin 2009).
From Postprocessing tab we use AddReplaceGroups and MarkDuplicates from Picard Tools (Wysoker, et al. 2011) and BQSR from GATK (McKenna, et al. 2010; Cibulskis, et al. 2013).
From Variant Calling tab we use Mutect2 from GATK (McKenna, et al. 2010; DePristo, et al. 2011; Cibulskis, et al. 2013).
From Variant Filtering tab we use FilterMutectCalls of GATK (McKenna, et al. 2010; DePristo, et al. 2011; Cibulskis, et al. 2013).
From Annotation tab we use VEP (McLaren, et al. 2016).
If you have downloaded the tutorial material, open VariantSeq and set a directory folder to where you want aforementioned material on your PC (e.g., your desktop). The space left of the directory browser is the FTP browser for VariantSeq. This connects to the directory folder on your PC with your user account on the local host site of the server side. Right click in the FTP browser and create a folder named VariantSeq_tutorial. Next, enter this folder and create the following subfolders:
00_raw_data: to deposit the exome fastq files that you will process during the tutorial. If the fastq files are compressed, you must unzip them first.01_quality_analysis: to deposit the results of the quality analysis.
02_preprocessed_reads: to deposit results of the preprocessing analysis.
03_refseq: to deposit for the RefSeq material needed to complete the tutorial.
04_ mapping: for the bam files produced during mapping.
05_addreplacegroups: to deposit the bam files produced during the AddReplaceGroups postprocessing analysis.
06_MarkDuplicates: to deposit the bam files produced during the Markduplicates postprocessing analysis.
07_BSQR: to deposit the bam files produced during the BSQR postprocessing analysis.
08_variant_calling: to deposit the vcf files produced during variant calling.
09_variant_filtering:to deposit the vcf files produced during variant filtering.
10_annotation:to deposit the vcf files which contains the effects annotation for the SNPs and the Indels called and filtered.
After this, use the FTP browser to move the 5 fastq files from your directory browser on your PC to the folder 00_raw_data in your local host account on the server side. Then use the FTP browser to move the reference genome sequence, interval file, PON, and training sets (referred to in the section 1.2) from your directory browser to the folder 03_refseq created in your local host account. The process is shown in Video 1.
Video 1. Setting directory folder and organizing the user account before starting.